Tuesday, December 28, 2010

Soy Vay!- a quick and easy Chicken Stir-fry recipe

Why hello...

It's been a while, hasn't it? The past month (and a half-ish) has been quite busy, as I'm sure it has been for everyone; filled with holiday festivities, family adventures, and for me, a new job! The new job is GREAT! I am really enjoying getting to know my co-workers, meeting community partners and volunteers, and learning about all the awesome work we to do empower folks to grow their own food!

I've been getting back on track to meeting some of my personal sustainability goals including buying a lot from the winter Farmer's Markets that our organization manages, shopping at our local Food Co-op, and also putting up some of the local produce I buy. Since chicken stir-fry is a weekly classic dish around my house, I've sliced and blanched about 6 pints of carrots and green peppers, which should get us through another 12 weeks of stir-fry once a week. On that note, since this is one of the dishes I cook that frequently gets requested, I'll share. It's simple, healthy, & easy- three re-occurring themes of my (limited) cooking repertoire:

Arika's Chicken Stir-Fry


Ingredients:
1 cup of Soy Vay's Very Very Teriyaki or Island Teriyaki
1 cup water
3 chicken breasts
1 cup sliced bell peppers (green, red or orange all work great!)
1 cup of diced carrots
1 small yellow onion, diced (or you can use green onions/scallions too)
2 teaspoons powered ginger
2 teaspoons powered curry (optional)


Start off by adding the Soy Vay and the water to a large fry pan. The water is important because a) it makes the dish more of a saucy one (rather than dry), and b) it thins out the Soy Vay so your dinner-eaters are not dying of a sodium overdose. If you don't have Soy Vay specifically, just combine some soy and teriyaki sauces, and then mince a few cloves garlic and add it as well. 

Put the stove heat on medium heat, and add in the carrots and peppers (unless you've blanched them before-hand, in which case they might not need to go in right away). 

After 5 minutes, add in the chicken breasts, onion, and spices. Cook for about 20 minutes on medium, or until chicken is cooked-through and tender. I try to have a batch of basmati rice going concurrently, so I can serve everything at the same time!

Again, it's pretty simple, there are few ingredients, and it is delicious! It might be a little high on sodium, but overall, Soy Vay products are all natural. The Island Teriyaki is the lower sodium of the two, if you're looking for lower-sodium options.

Enjoy! I know I will :)

Wednesday, November 17, 2010

Monday, November 8, 2010

Time to make a change

... to a new job!! I have accepted a job with Growing Hope in Ypsilanti. I really enjoy the volunteers and my co-workers at my current job, and I will truly miss them. I plan to continue to be involved as a volunteer so I won't be saying "goodbye", just "see you soon!".

Truthfully though, I am beyond excited to be starting this new position at Growing Hope. Growing Hope is a local nonprofit, whose mission is to help people improve their lives and communities through gardening and healthy food access. Could that be more up my alley?!

Check out their website here:


I'll be working as the Outreach and Volunteerism Manager. Here are the reasons why I'm so so excited for this position:
  • Major dream accomplishment- I can WALK/BIKE to work! Their offices are within walking distance of my house and I estimate cutting off about 6,000-8,000 miles of driving per year!
  • The mission and work of the organization- to be working in the community that I live in, helping to teach people and connect them to local, healthy food? If I could have dreamed up a complete fantasy job, this would be pretty much it :)
  • The staff- there are only 3 full-time staff, including me, and 2 part timers, along with some Americorp Vistas- definitely a smaller staff than what I'm used to. There's also a great, supportive Board of Directors. I got to meet most everyone this weekend and everyone was so welcoming that I felt right at home!
  • I'm looking forward to building more connections in my community, rather than working just outside the city. The work I do will directly make a positive impact on the city of Ypsilanti, and I love Ypsi so much that this is a thrilling idea!
  • This will be a chance for me to grow my professional skills, and to strengthen my personal dedication to my community. I also will be able to help others to work on the very things I am working on personally- buying more local food, growing more of my own food, supporting local farmers and vendors.
This is a huge HUGE step in a positive direction. I can't wait to get started- I have so much to share, to learn, and to develop!

Tuesday, November 2, 2010

Sharing my skills

On November 13th I will be leaping into the fun, crazy world of micro-enterprising, with a booth at Art in the Park, an Indie Art event in my neighborhood! My friend Jen and I are sharing a booth, and are hoping to share our homemade goods with the community and get a positive response. What might I be selling at this Art Fair, you ask?

I will be selling some of my canned goods, including Cran-apple sauce, Baked apples, and maybe some canned peaches as well. I also enjoy knitting and I'm a pretty solid hat knitter, so I'll be bringing some hats and scarves with me! My friend Jen will be selling her beautiful photo prints, as well as some paintings she did.

Since neither of us have done this kind of thing before, we're kind of diving in and hoping for the best. I'm not expecting to make any kind of living or decent amount of money off of knitted scarves and canned fruits, but I enjoy doing these things anyway, and sharing my skills and things I make with others. Preparing for the event has been a helpful lesson in coordinator of media exposure: I made a new email address specifically for my crafty side, now dubbed Happy Home. I re-vamped my blog title and banner (as you can see above) so it reflects the title of my small, small businesss. I also ordered some business cards for Happy Home off of http://www.vistaprint.com/ which has some great deals if you're willing to use a template. I made a facebook page for my new business. That way, if people like the items I have to offer, they can check me out on facebook, email me, be directed to my blog, etc. all from my business card. I also made a website specific to Happy Home, where folks can buy stuff online if they'd like, and linked it to my blog.

Whew!!

This is a small venture, but I'm looking forward to it! It feels good to know that I am capable of making functional, beautiful things with my own hands- things that people might want to have!

Monday, October 25, 2010

Reflections of a first-year Homesteader

After truly diving in to this so-called homstead adventure this year, I thought it would be nice to sum up some of my thoughts, lessons learned, and plans for next year. The end(ish) of the harvest is a good time to reflect on what went well, what could have gone better, and what really does not need to even be bothered with next year. So let's do that.

Planting/Production-
Worked well:
Potatoes did really well. Need more
Onions were awesome, easy to care for. More, I say!
Lettuce was delicious, although slower than I expected, since I am impatient
Carrots are easy to fit along borders, smaller spaces. Yes!
Tomatoes... mmm! Canned over 18 quarts of tomato sauce. More next year!
Basil was great- need to utilize more
Jalepenos were just hot enough, great in chili and other dishes

Not so well:
Strawberries did not produce like I wanted, didn't have enough. No strawberries next year
Raspberry plant grw like crazy, produced 5 berries. Is young plant, however
Blueberry bushes similar- 5 berries. Oh well!
Celery was kind of a cool novelty, but took up vital space for other stuff
Glacier tomatoes kind of tasted gross. I'll just wait for the real thing

Seed starting-
Worked well:
Lettuce indoors was awesome
Basil was brought in at beginning of Oct and is doing well

Not so well:
Need to start things on time :)

Preserving-
Worked well:
Peaches were delicious
Apples were easier to do with apple core and peeler machine

Not so well:
Tomatoes went quickly- need more for sauce next year
Pickles- more next year


Storing-
Worked well:
Onions are storing well so far- will run out quickly since we use a lot
Potatoes- same story!
Carrots- could store next year as well

Not so well:
More!

Purchasing-
Worked well:
Getting into pattern of going to Co-op for most things, Kroger for snacks and processed only
Getting local meat, eggs, milk, butter and bread delivered to our door! :) :) :) :)
Not so well:
Went to farmer's market a lot towards end of summer- need to work on it!
Living-
Worked well:
Getting pretty good at buying recycled paper products consistently
Moon cup
Most cleaning products are eco-friendly
Can now recycle 1s-5s! :)

Goals for 2011-2012

Plant-
20 potato plants
75 onions
50 heads of lettuce
20 tomato plants
4 basil plants
200 carrots
4 jalepeno plants
10 bulbs of garlic
2 watermelons
2 bell pepper plants
4 pumpkin plants
4 zucchini plants
dill
rosemary

*Expand into "raspberry bed"
**Make potato bed deeper

Seed Starting-
Start everything possible indoors
*Have saved many seeds already!

Preserving-
Canned:

6 pints Pickles
20 quarts Tomato Sauce
20 pints Peaches
10 pints Pears
3 pints Cranberry Sauce
5 pints, 30 4 oz Applesauce
12 pints Baked Apple preserves
5 pints Blueberry jam

Frozen:
12 half-pints Corn
4 quarts Beef Chili
16 frozen Raspberry Muffins

Dehydrate:
4 bags apples rings
6 bags banana chips
fruit leathers?
2 bags dried cranberries

Storing-

200 potatoes
50 onions

Purchasing- TBD

Living- TBD

The Put Up Lowdown for 2010

Went through and tallied all of the canned goods I have put up during 2010. I have a total for ya'll, although this is a tally of everything I have left, not everything I canned in 2010 all together.

Here goes!

Canned:
3 pints Pickles
6 quarts Tomato Sauce
17 pints Peaches
7 pints Pears
1 pint, 1 half-pint, 3 4oz jars Cranberry Sauce
4 pints, 6 half-pints, 5 4oz jars Applesauce
12 pints, 3 half-pint jars Baked Apple preserves
5 pints Blueberry jam

Frozen:
3 pints, 11 half-pints Corn
3 quarts, 1 pint Turkey Chili
2 quarts frozen Tomato Sauce
3 containers dried apples
16 frozen Raspberry Muffins

Stored:
30 red thumb potatoes
25 onions


Woohooo!!! I'm very proud of my self. I'll be eating seasonal, local fruit for at least part of the Winter. My goal is to avoid buying fruit if at all possible (although the girls love it and so do I) until it is in season. I will probably cheat because grapes and bananas are pretty standard in our house. But I'm going to dehydrate a lot of banana chips, and I hope I can also do more apples slices, etc.

What else is good to dehydrate? I tried making fruit leathers and they were very leathery as they stuck to the plastic tray they were created on. They tasted very good but they did not come off. How do I prevent fruit leathers from sticking to the tray from whence they came? :) A teeny bit of cooking spray? Would that be gross?

I still have some cayenne and jalepeno peppers growing in the garden, along with the lettuce, basil, and a few lonely tomatoes. I planted garlic several weeks ago and it is shooting up already. Our weather has been so warm lately!

Also, happy to report that I transplated some of our outdoor basil plants inside under the grow lights, and it is doing pretty well- growing back, albeit slowly. Fresh basil in the winter! :)

Tuesday, October 19, 2010

I can't Deni this feeling..

This weekend, while visiting my hometown of Columbus, I stumbled upon a nice little food dehydrator while thrifting around at New Uses. New Uses is a Plato's Closet store of sorts, except instead of clothes, they have applicances and furniture, etc. They had a Deni brand dehydrator for $20, and so I had to purchase it, of course! I have a small problem with Food Preservation Tool Envy. I know, I know- it's bad.


So of course, I had to try out this new toy of mine. Yesterday I sliced up some Goldrush apples and powered up the Deni!

Results? Fairly impressed! Some trays took longer than others to dry out, but in fairness I cheated and did a little bit of overlapping that was not supposed to happen. I also was not 100% precise in my apple slice-measurement techniques. Oh well! The only annoying part was that I was silly and started the process at 6:30pm, which meant that I was up at 1am and 3am and 5am checking on apple slices. I need to do it on a day where I get home early, or on the weekend.

My next goal is to make some fruit leathers! I never in my wildest preserving dreams thought I would be making fruit leathers. I'm pretty (way-too) psyched about it. I'm thinking blueberry/raspberry fruit leathers?

Also, I went to the Worthington Farmer's Market with my mom over the weekend, and they had the most delicious F'ing strawberries there. Ever. Pardon my language, but those berries were just SO good. Each time we took a bite of one throughout the day, one of us felt compelled to exclaim something like, "OH my GOD these berries are SO FUCKING GOOD!" or some other comment about how the berries in the store in January are like mutant berries from hell. So well done, farmer man in Worthington. Those are some sweet strawberries! If I could have forseen that I would be buying a dehydrator later on that day, I would have bought like 4 quarts and preserved those babies!

Another day.

Other preserving goals this week:
  • Make blue/raspberry fruit leathers
  • Can applesauce and apple slices
  • Make and freeze some more soup broth
  • Make and freeze more chilli before tomatoes and peppers go away for the season
  • Stop by Farmer's markets and freeze good veggies before market closes down for season!

Can I do it all?

Yes I can! :)

Saturday, October 16, 2010

Tidying up the Fall Garden

Garden activities are finishing up now that it's mid-October.

It's time to harvest those last crazy tomatoes and pick those jalepeno peppers. They give great flavor to soup, or our new favorite family dish to make, chicken stir-fry. I transferred the little lettuces I started with my indoor grow light, and they are doing SO well- they love being outside :) I'm excited to have fresh lettuce for another few weeks. We planted garlic last week, and I actually had some garlic come up from when I planted it last spring mistakenly! I chose two different varieties from Dyer Family Organic Farms . I bought two cloves of each type, one to sample, and one to plant- Chesnok Red and China Stripe- both kind of "zesty" varieties- Yum!

Pictures to follow :)

I also started recently receiving weekly deliveries from Calder's Dairy! I've signed up to receieve a loaf of bread, two half gallons of milk, and butter as well! So far (minus an address mishap) I've been very happy with quality of products and bread was delish!

Now I am having local chicken, turkey, pork products, eggs, milk, butter, and bread delivered to my house- this is a big accomplishment to check off of my Local Eating Goals list!

Monday, August 30, 2010

Tomato Sauce

So last week(ish) I solicited your tomato sauce advice and expertise, and you gave it. Thanks especially to Jen B. and Di, who sent me their family recipes! I ended up combining several recipes, because it's hard for me to actually follow directions :)

I will be unveiling pictures soon! I ended up with 10 quarts of tomato sauce- woo hoo!! ....

Here's my preserving count so far:

18 pints and 1 quart of canned Peaches
10  4 quarts of Tomato Sauce
5 quarts and 1 pint of Chili (frozen)
9 half-pints of corn (frozen)
1 half pint of blueberry jam
7 pints of pickles

My goals for the next month are:

12 pints of baked apples/apple slices
10 pints of applesauce
4 pints of apple butter
4 pints pumpkin pie filling (frozen)
5 quarts butternut squash soup (frozen)

Also on the Homestead front, I've got 30 heads of lettuce ready to plant outside for the fall and 20 more heads started that are incubating inside. I also started a few dill plants and basil plants inside, with hopes of keeping them inside until the spring.

I've bought some Seeds of Change seeds on sale for next year, including cherry and roma tomatoes, pumpkins, lettuce, and onions. I've saved seeds for bell peppers, and some hot peppers and well, and my friend Steve is supplying me with some Korean melon seeds that will be an interesting science experiment :)

I started late, but boy did I get going!

What have you put away this summer?

Monday, August 9, 2010

Tomato Sauce assistance needed!

On Wednesday, I plan to can two of my favorite foods:

Peaches and Tomato Sauce.

To be specific, Tomato Sauce is not one of my favorite foods, but pasta of any kind definitely is. Canning Tomato Sauce allows me to eat pasta more cheaply. How could that be bad?

Does anyone have any Tomato Sauce recipes they swear by? I've never made it before. I have the standard Ball Blue Book of Preserving recipe but I'm looking for other suggestions.

Calling all canners- Marina Sauce recipes please! :)

Now peaches, on the other hand- we got those down! I think peach slices are my favorite thing to can. They are easy, they can be pretty cheap if you can get a deal from your local farmer on a bushel, and they are DAMN good. Like obsecenly delicious.

I'll post the recipes I use (and some pics) after my adventures on Wednesday!

Sunday, August 1, 2010

Sunflowers


This was a satisfying weekend. A weekend full of friends, family, true relaxing, and some gardening. I needed a weekend like this. Here's the highlights:

  • I checked on my little lettuces and they seem to be doing well. I'm kind of flying by the seat of my pants here, and I'm not sure how much light or water they need but I've been trying to find more specifics and in the mean time, they've been getting about 12-14 hours of florescent lighting a day.

  • I installed my second grow light- woohoo! I don't think I'll start anything else inside until the late Winter or early Spring, but I just couldn't wait to experiment and get things set up!

  • My sunflowers bloomed! See above! They are pretty and graceful and I'm still surprised that they grew from seed to this in one season! I absolutley love sunflowers.

  • I saw a very depressing and thought-provoking movie called Countdown to Zero. It's about Nuclear Proliferation and it kind of made me want to build a bomb shelter in my backyard.

    • Since I'm not even sure how to talk about that whole subject with out depressing myself, I will simply say this- write to your congress person and tell them that they need to do their part to safely get rid of nuclear wepaons and safeguards to make building and selling nuclear weapons harder.
Anyway.. here are pics of my new improvements and my baby lettuces.


Here they are close up :)

Wednesday, July 28, 2010

Last week's harvest

I forgot to post pictures of all the onions and potatoes I pulled last week! I have learned my lesson for next year but I was to impatient to wait- I just had to pull them! Most of the potatoes were pretty done growing, it seemed, but the onions would have gotten bigger if I had waited. Oh well- little cute onions are just as delicious as medium-sized cute onions!


And they were delicious. :)

Well they were, but I let some cure in the nudroom and then I braided the remain in an attempt to pretend I am a person who knows about these things, and they are sitting in the basement hopefully being preserved.

Indoor Seed Starting project!!!

So I have some exciting news folks- today I began to set up my seed starting station in the basement, the one I mentioned in an earlier post. A friend of mine had a bunch of seed starting stuff including the floresent light fixtures and bulbs and a lot of plant tray and plastic holders! :) I went to Lowe's (not as local as I would have liked, but I ran out on a spontaneous whim and I do own stock in Lowes!) and picked up:

  • 2 seed starting kits that included peat, and the plastic underneath containers, each holds 75 plantlings!
  • 8 lengths of 1.5' chain to hang up the fixtures
  • Some screw-in hooks to hang the fixtures from the shelves

See planting kit:


I ended up planting 36 spaces for lettuce and I tried a few pumpkins but we'll see- that's more of a Frankenstein-type project. Once I planted the seeds, I started on the task of hanging the light where I wanted it. I started with the top shelf, and installed the hooks where they needed to be. Once I did that, I simply hooked up the light fixture!

See here:

and here:


kinda creepy lookin' there.

So Yea!!!!!! I'm fairly excited about this ;)

My plan is to start the baby lettuces indoors and then move them out to the garden
(once I weed the hell out of it) once it's cooler again.
Then we can have lettuce through the early fall, I hope!

Tuesday, July 13, 2010

First Harvest

Look at what I pulled up from my garden!

onions onions onions

                                                      
                                                                 some glacier tomatoes :)

a ton of potatoes!

  When life gives you potatoes- 
you should make this fucking delicious potato salad!


Ina Garten's Potato Salad
http://www.foodnetwork.com/recipes/ina-garten/potato-salad-recipe/index.html
(I subbed a little bit of regular mustard and some sour cream in place of the Dijon and the whole-grain mustards because my husband hates things that smell like Horseradish lol)
  • 3 pounds small white potatoes
  • Kosher salt
  • 1 cup mayonnaise
  • 1/4 cup buttermilk
  • 2 tablespoons Dijon mustard
  • 2 tablespoons whole-grain mustard
  • 1/2 cup chopped fresh dill
  • Freshly ground black pepper
  • 1/2 cup chopped celery
  • 1/2 cup chopped red onion

Directions

Place the potatoes and 2 tablespoons of salt in a large pot of water. Bring the water to a boil, then lower the heat and simmer for 10 to 15 minutes, until the potatoes are barely tender when pierced with a knife. Drain the potatoes in a colander, then place the colander with the potatoes over the empty pot and cover with a clean, dry kitchen towel. Allow the potatoes to steam for 15 to 20 minutes.

Meanwhile, in a small bowl, whisk together the mayonnaise, buttermilk, Dijon mustard, whole grain mustard, dill, 1 teaspoon of salt, and 1 teaspoon of pepper. Set aside.

When the potatoes are cool enough to handle, cut them in quarters or in half, depending on their size. Place the cut potatoes in a large bowl. While the potatoes are still warm, pour enough dressing over them to moisten. Add the celery and red onion, 2 teaspoons of salt and 1 teaspoon of pepper. Toss well, cover, and refrigerate for a few hours to allow the flavors to blend. Serve cold or at room temperature.

Sunday, July 11, 2010

Refrigerator Pickles

After vacationing at Sleeping Bear Dunes, (a family tradition!),
I was eager to get home and start preserving. Besides soup, I haven't preserved anything else- time to get going! My mom and I found this Refrigerator Pickles recipe in Organic Gardening, and it looked delicious: like the epitome of summer! I gave it a try- my first experience pickling pickles!

Audrey's Pickles from Organic Gardening
1 pound medium cucumbers
3 cloves garlic
½ teaspoon black peppercorns
½ teaspoon whole mustard seed
1 teaspoon fresh dill weed
1 whole dried bay leaf
2/3 cup brown sugar
6½ tablespoons white distilled vinegar
6½ tablespoons white-wine vinegar
¾ cup water


1. Cut the cucumbers into spears or slices and place in a 2-quart container or jar with a lid. Add the garlic, peppercorns, mustard seed, and dill weed. (I used 4 pint jars instead, and just divided the cukes, garlic, peppercorns, mustard seed, and dill weed among the jars)


2. Stir together the brown sugar, vinegars, and water. Pour the vinegar mixture over the cucumbers and shake the jar(s) well to combine. Cover and chill. For fullest flavor, wait at least 24 hours before serving. These pickles will keep up to 3 months in the refrigerator.
Makes 2 quarts (about 18 servings)


Pickles!!!


Mike and I sampled them yesterday (we couldn't wait any longer, since 24 hrs is a loooong time), and they tasted pickley, even after just a day! :)

I think I am going to make a few modifications for the next time around (aka this evening), to make the taste a little more to my liking. There were a few small things I changed:
  • If you're going to use pint-sized jars, I think you need more spices in each individual jar
    • I bumped up the amounts of peppercorn, mustard seed, and dill
  • The amount of vinegar and water was not nearly enough to fill each pint jar
  • I didn't have bay leaf, so I didn't use it
  • Increased the water proportion a bit more since I was upping the amount of vinegar used as wel
Here's my modified version:

Lycan Family pickles

1 pound medium cucumbers
3 cloves garlic
3 teaspoon black peppercorns
3 teaspoon whole mustard seed
3 teaspoon fresh dill weed
3 teaspoons of "spice" of your choice- jalapenos, ground red pepper flakes, etc. I chose to use McCormick Italian Spice
2/3 cup brown sugar
14 tablespoons white distilled vinegar
14 tablespoons white-wine vinegar
1½ cup water

Enjoy!!!

Thursday, June 17, 2010

The Moon Cup- for all your "feminine product" needs

*warning* If you do not like to hear about women's bodily functions, you should probably skip along to my next post :) Also, you should probably get more comfortable with your body- but hey, it's up to you!

I was talking with a friend (Jen) yesterday over dinner when the subject of "feminine products" came up. I hate even calling tampons and pads and stuff "feminine products", because who feels feminine when they wear them? No One. Anyway, I was mentioning how I ran out of tampons and pads for the girls, because I don't use them. Jen looked a me like a was a little strange for a second, and hey, I am!, and asked

What do I use for my period if I don't use tampons or pads?

SO I introduced her to the Moon Cup (or the Keeper, same diff), and I thought I would feature it on my blog as well. The Moon Cup is basically a cup that you insert into your vag, and it collects the blood etc. that is expelled during your period. You take it out and empty it periodically, just like you would switch a tampon, or change a pad.

Here's a picture of it!

*I was not going to post anything on my blog about the Moon Cup, because some of my readers are people I actually know, but that's silly! There's no reason for me to be embarrassed about my body, and I think this info could be helpful to folks looking for a more comfortable, less environmentally-harmful period solution.*

There are many benefits that I have experienced so far while using the moon cup for the last year:
  • No last minute tampon-buying sprees- I always have my Moon Cup
  • No wasted paper products- Moon Cup is made of silicone, it's reusable and lasts up to 10 years
  • No wasted money- In the long run, it's much more inexpensive- the Moon Cup is $34.00 and a box of tampons is $7, but over 10 years, you would spend nearly $800 on tampons, where as you would only spend $34 on the Moon Cup.
  • No post-period aches and discomfort- My vag always feels dry and sore after using tampons for a week. the Moon Cup catches what it needs to, but does not absorb the natural moisture in your vag so you won't feel uncomfortable after you use it during your period
  • No ridiculous marketing shit- I always hated shopping for tampons. So many pink, fluffy choices that are all supposed to be designed for "women's comfort".
Yes, tampons are very comfortable, compared to pads which are like a small diaper. Pads are comfortable, compared to a rag or one of those strap-on maxi things they used in the 50's and 60's. But why should we settle for a "feminine product" that is not designed by women, or for women's comfort and ease of use?

There are two potential downsides I have noticed while using the Moon Cup:
  • You have to actually reach inside your vag a little bit to insert and/or remove the Moon Cup. But it's your body, and if you don't wanna touch it, who else is going to want to? :)
  • You have to plan ahead a bit more when using the Moon Cup. If you're in a public restroom and you need to clean/empty your Moon Cup, you have to either take a bit of wet paper towel in there with you, or wipe it clean with some toilet paper. You can't just throw it in the toilet and flush it down like a tampon.
I would argue though, as someone that enjoys being environmentally conscious, that I can spare a few extra moments of preparation in order to not use a dump truck full of tampons during my lifetime. Also, we're such a culture of :

use it,
   throw it out,
      dump it,
         Just buy a new one!

The Moon Cup allows me as a woman to make a very conscious choice to reuse instead of dispose. By not spending $840 on 'feminine products" over the next 10 years, I am choosing to spend my money on the health, comfort, and safety of my vag, and frankly, on other things besides crappy products marketed to freshen and clean my crotch.

Also- It's made in America! The company is based in Cincinnati- go Ohio! :)

If you're interested in reading more or purchasing the Moon Cup or the Keeper, check out their website:


There's a basic FAQ page about the Moon Cup that will probably answer some questions that came up while you were reading my post.

Also, post a comment if you have questions about using the Moon Cup- I'm glad to answer! :) Thanks for letting me share.

Friday, June 11, 2010

Distractions...

I know I haven't posted in a while- I've been a slight bit distracted with trying to help my two favorite ladies study for finals and get their grades up! I am happy to report that although several classes have to be re-taken, grades are up, and summer school is sign-up for!

On a garden-related note, look:

Our first strawberries!!! :) :) :)

Wednesday, May 26, 2010

Container Gardening- making gardening possible for almost everyone!

If you are living in a small space (apartment, loft, condo, renting) and you don't have the ability to mangle and dig up your yard like I have done, don't worry- you can still garden! Do you have a patio, front porch, or deck? Container gardening is a fun, easy way to bring some "green" into your living space, and these days almost every gardening/home goods/hardware store has pots, plastic containers and even those neat hanging plants!

First, you want to know a few things:
  • How much space are you working with? Get out that measuring tape, yard stick, or ruler and size up your space! If you have any kind of simple shaped patio (a square or a rectangle), you can just measure the length of the outdoor space by the width. If you have some crazy angles going on, you might have to get a little creative. There are some formulas out there on how to calucate that area.         
  • What hardiness zone are you in? Depending on where you live and the climate and average temperatures, there are guidelines on when it's best to plant what. Find out your zone here: http://www.usna.usda.gov/Hardzone/ushzmap.html
  • How much light does your outdoor space get? 6 hours of daylight? 8 hours of daylight? Partial sun? Full Shade? Depending on the type of light you get and the amount, certain plants might be off limits to you, or might be really hard to grow succesfully. Check that out!

Second, envision what kind of space you want. For this part of the project, I find it helpful to browse through gardening magazines and websites. Get a vision of what kind of space you'd like, and also, what you want the function of that space to be. Are you a reader? Maybe you want a little chair out on your patio, and just a few flowers in pots to brighten up your reading space. Are you a tomato-lover? If so, maybe you want to get some pots or something like the Topsy Turvy Upside-Down Tomato Planter. Maybe you want to plant a variety of edibles. A cherry tomato, a strawberry planter, a pot with several bunches of leaf lettuce... you can pretty much plant anything in a container rather than in the ground, as long as the container is deep enough and wide enough.
  • Make sure you check out the light and space requirements for each plant you're planning on bringing home. Tomatoes need heat and light and shouldn't be planted until it's summer- June 1st is a safe date for zone 5b. Leafy greens can be planted earlier, as well as onions, potatoes, and garlic!
Third, get those containers! Once you've laid out the plan for how much space you have, how many plants you'd like to plant, how much space the plants need, and how you want those pots and containers arranged in your space, you are ready to actually do some purchasing! Many local garden stores and hardware stores as well have a large variety of clay pots, plastic planters, hanging planters, etc. Just make sure you are getting the appropriate sized container for the plant you want in there. Don't get a 3"x5" pot for a potato plant. It needs more depth, more space, and it won't grow to full potential in there. I think if you're investing the money, you might as well do it right! :)


Fourth, get those plants, and get some soil to keep them snug! There are a variety of places to get plants for your container garden. A lot of the big boxes stores have pretty flowers and some edible plants as well, and they are usually fairly good quality. I prefer supporting a local farm or nursery if possible- you can easily google "family farm" or "local vegetable plants" or "nursery + my city". No matter where you get your plants, just make sure you check the quality. In general, plants should have good color and turgidity (stems should be strong and upright and plant should not be wilting).


Fifth, plant those babies! Once you've got the plants, the soil, and you've got the containers, you are ready to plant! Fill the pots with enough soil that the plants is at a good height within the pot. When you're planting, for the most part, you don't want to drown the plant in soil. There's a good balance between making sure the roots are covered up and making sure the stem is not submerged in soil. The plant should have a tag that might give you some guidelines as well. You might have found plants that are already in cute containers to begin with, and in the case you don't even need to transplant anything! Make sure you water the plant well once it is settled into it's pot so it will thrive in it's new home. If you want to add a little fertilizer you can, but make sure you read the label carefully, and only apply the suggested amount- a teeny tiny bit! Fertilizer is a whole different lesson, folks :)

Woohoo! You now have a delightful container garden, reading area, shade garden, veggie plot, etc. Relax, enjoy, and don't forget to water! :)

Monday, May 24, 2010

Tomatoes go in!

Today I got my tomato plants in the ground:
10 Amish Paste
1 Sun Coast
1 Snowberry
1 Black Cherry

Here they are:
 

Here's the whole garden:

Here's some strawberries- ahh!!

and my toes..

Raging potato plants:

Raspberries (just covered them with netting so birds don't eat them!)

Lettuces!:

Tomatoes :) mmm

Tuesday, May 18, 2010

'Tis the Season

the Season of Spring, that is!

These last few weeks have been Busy Busy Busy. Mostly with sophomore level math homework and teenage/25-year old angst. But also with my birthday celebration, fun times with the girls, family visiting, garden/yard work, etc.

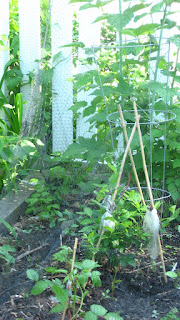
Garden seems to be doing really well over all. I solved the disappearing strawberry plant problem by taking some wire tomato cages and wrapping landscape fabric around them- making a crappy sort of barrier. It's worked so far, knock on wood.

Pics!
stuff is growing!! see the 'strawberry cages' I made?
strawberries are doing really well! These are the Allstars
flowers :)
Potato plants are growin' crazy! I think we have 27 plants?
Onions and lettuces are doing just fine
APPLES!
and Helo and Thene. Growin' crazy as well :)

Monday, May 3, 2010

Pest protection

So back to a homesteading topic- Pests!

Something is ripping up my strawberry plants. The actual plants themselves- there aren't even any berries or any beginnings of any fruit to eat! I found 5 plants just pulled out of the ground, and some of the stems were ripped off- but none of the plant actually seemed to be eaten.
Any guesses on what this might be? I'm thinking about getting netting but I'd like to have more than just a stab in the dark about what this is.

But look!:


Blueberries!!

Operation Move-in = Success!

(disclaimer- indirectly related to urban homesteading) :)

The girls moved in this weekend, and I may jut be speaking for myself, but I think we had a great time! I picked them up on Friday night and we picked up groceries together, selecting things we would all eat for the next several days/week. We made a couple of meals together, we played Taboo and Mad Gab and Cranium, we watched some movies... really, truly had a lot of fun. Sounds silly, but I'm always pleasantly surprised by how nice and friendly and warm Sam and Chels can be- when I was a teenager I was an ass to my parents. But then again, we're not their parents, so maybe that's some incentive?

Today was a big milestone- Sam had two Geometry worksheets, or subject-of-death worksheets as I like to call them. I HATED Geometry when I was in high school! So first, Sam actually told me she had homework which was a positive step haha, and then we actually completed all of it!! That's a big step for someone who has a tough time with math. And Geometry is so tricky- if you don't learn from the beginning, it's soo tought to build on those concepts. Sam got really frustrated at the beginning, and needed to take a break. But she came back to it after a nap with a lot of patience, and finished all two worksheets, showed her work and everything. She was receptive, she listened, and I think she even learned a little bit lol.

Anyway, just wanted to share that. My heart is ridiculous and it is bursting with sister/sudo-parental joy!

Saturday, May 1, 2010

Garden update- Week 2

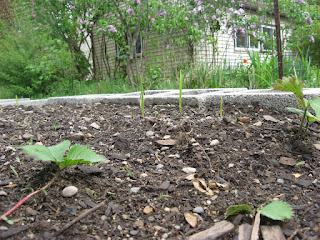
It's been two weeks since I planted most of the things in my garden, and everything seems to be doing really well! I have onions everywhere, both varieties of strawberries are going strong, lettuce is doing well, and I have little garlic shoot and potato plants coming up! Still waiting on carrots- I have a few little sprouts of growth but I can't really tell if it's carrots, or just little weeds haha!

Here's some updates photos:

I planted 4 Siberian kale plants and 4 celery plants today that I got from the farmer's market!
 this Glacier tomato is not looking too good.


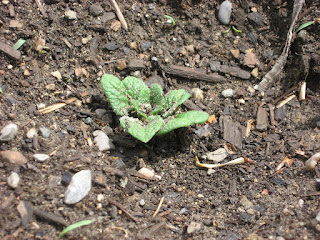
Potato plants are coming up!!!

onions everywhere!

Strawberry plants are beginning to flower!


Garlic shoots comin up!

more potatoes :)

Garden view

Friday, April 30, 2010

Sisters

I usually don't stray off the urban homesteading/gardening topic too much here, but I'm making an exception today!

Tonight my little sister Sammie and her sister Chelsea are coming to stay with us for a while. Their family is moving to about 30 minutes E. of here (Liviona), but the girls are at Ypsi High and wanted to at least finish out the year there, which I don't blame them for! Mike and I offered that the girls could stay at our house until the school year finishes up, because Liviona can be pretty far away when you don't have transportation!

I'm very excited, but also a little nervous! I want to give them a supportive, positive environment, but I want to do that without being overbearing and overwhelming. How does one do that? haha! It's also tough because I'm their sister, and not their mother or aunt.. I'm not their age, but I'm only 9 years old, and I often come across that tough spot to balance between being a friend/sister and being a positive role model and mentor. I'm also not their biological sister, I'm their 'Big Brothers Big Sisters' sister. But I think after 6 years matched together, we've gotten to the point where we're able to drop that distinction, and just be sisters who live in different houses (until now!) :)

They're both working on improving some poor grades, but at our house they will have a quiet place to study, a computer they can use to do homework and papers, and a few less siblings to contend with! I'm crossing my fingers that they can boost up their grades for the end of this year and that they won't have to take any summer school classes. That would suck for everyone involved! I know they have the capacity to succeed, I just hope I can be supportive and motivating enough to help them do so!

Here we are! I am a pale vampire, by the way. Chelsea is on the left on Sam is on the right :)

Friday, April 23, 2010

Spring love

Our edible plants are just shooting up left and right! We have little onion shoots coming up in bed #1, and the lettuce seedlings are doing well! The Ozark Beauty strawberries are getting leaves, the All Stars are continuing to look good. Haven't seen any action from the potatoes or garlic yet, but they're under there, doing their stuff!


I posted the other day on the possibility of seed-starting indoors next year.
I am constantly amazed at how sharing and talking with people is so beneficial. I feel like if you put that energy out there, things work out your way sometimes.
I was talking with my friend Anna about seed-starting and she told me she had 4 or more shop lights that she had bought for seed-starting a few years back, but couldn't bear to "weed out" the weaker seeds once they all started to grow, so she ended up with like 200 tomato plants :) So she said she would be willing to give some supplies to me!

I really love Spring. It's time to come out of hibernation :) I've had a lot of opportunities to get together with new friends lately, and I have really enjoyed that. People at work that I enjoy but haven't made a point to extend that friendship. Friends of friends that I feel are pretty much friends already, although we've not spent that much time together! I've really enoyed the chance to do this, and I'm thankful for it.

Family time this weekend has been well-earned. There's a strong chance that we will be having a 16 year old living with us for the next two years starting next week, so a lot of relaxing this weeekend is in order...

more on that to come! :)