Wednesday, November 30, 2011

Sweet, local Honey goodness

this pic does not do honey justice
While there are many things that we look to get a bargain on when we shop, one of the I have learned not to compromise on is honey. It might sound silly- honey is pretty delicious to start with- why be picky? I asked myself the same thing, until I had truly local, raw honey, straight from the hives of two of my favorite Farmers, Dick and Diana Dyer. Diana is a Registered Dietician (and blogs here), and she and Dick got into farming as a full time gig several years ago. Their original specialty is garlic, another "common-place" thing I have learned to become picky about; once you realize there is more out there than just elephant garlic out there, it's hard to go back to the plain old grocery store variety!

Getting back on topic, I tried some of the Dyer's Washtenaw Wildflower honey earlier in the summer and I was hooked! The taste of home "grown" honey is far more deep, rich, and complex than the standard store bought kind. It's just amazing. As soon as I found out there was a second honey harvest this fall- a flavor entitled Fall Farm Goldenrod, I made sure I picked up 2 quarts of the stuff before it disappeared! It's a bit darker and not as light on the tongue as the summer honey, but just as delish!

If you can find local, raw honey, and support a family of incredibly nice farmers in the mean time, I suggest that you run out and purchase yourself some ASAP!

Monday, November 28, 2011

Homemade Bagels

Our roommate Paul is sort of a renaissance man- at least in my opinion! He bakes, he cooks, he has a record player, he plays an instrument.. you have to admit that he sounds pretty cool, right? Anyway, the reason I'm bragging about him is that he makes lots of homemade goodness that I get to try. Last week, he made BAGELS!

Let me just say- This family loves us some bagels. We almost always have bagels on the countertop, and they can get expensive! My favorite local ones, Barry's Bagels, which taste like smooshy semi-cooked chunks of dough (in the best way possible) are $3 for 4 bagels at our local co-op. When Paul made these homemade bagels, they were amazing; they even looked bagely! He was nice enough to make a batch with me, so I could learn.

Today, I made a batch all by myself; I'm going to share the recipe with you, because they are easy to make, and I want to bestow the skills of bagel-making upon everyone who reads this blog. Best of luck- tell me how your bagel-making experiences go!

Paul's Homemade Bagels

These are onion bagels- mm!
Ingredients:
3 cups flour (I use 1 cup bread flour and 2 cups white wheat flour)
1 1/4 cup warm-hot water
1 tbs olive oil
1.5 tsp salt
1 tsp sugar (to activate) & 1 tbs sugar to sweeten
2 1/4 tsp dry active yeast
1 egg white
3/4 cup wheat germ


Directions:
  • Add the yeast and 1 tsp sugar to the warm water, and stir briefly.
  • Let the mixture sit for 10 minutes- a 1-3 inch foamy layer should develop if yeast is properly activated.
  • Once the yeast mixture is ready, pour it into a large mixing bowl.
  • Add the cups of flour, mixing in between each. Add the salt & sugar.
  • Next, flour your countertop and place the dough onto the surface, kneading it for 5-10 minutes. Once it gets to the right consistency, it should just barely stick to the surface when you pick it up and drop it.
  • Spread the olive oil on the inside of the mixing bowl, and then place the dough in the bowl to rise.
  • Cover the bowl with a towel, and place in a warm, dry spot for 25 minutes.

  • While you're waiting for the dough to rise, You should get the remaining steps ready:
    • Fill a large pot with water, and set it to boil
    • Crack an egg into a small bowl, and leave only the white
      • Stir the egg white for several minutes until it is foamy-looking
    • Fill another small bowl with the wheat germ, and set aside
    • Place your baking pan on the counter so it's ready
    • Pre-heat the oven to 400 degree
    •  Roll each piece into a 4 to 6-inch log. Join the ends and place fingers through the hole and roll the ends together. Repeat with the remaining dough. Now you should have 8 un-cooked bagel shapes!
    • Take the bagels (4 at a time) and place them into the boiling water, for 1 min 30 seconds on each side. 
    • When all the bagels are done, pat them dry. 
    • Dip them on one side in the egg whites, and on the other side into the wheat germ (this side becomes the bottom of the bagel)
    • Place the bagels evenly spaced on the tray, slide the tray into the oven, and set the timer for 20 minutes! Bagels are usually done in 22-23 minutes, but check them at 20 minutes just to see how they're doing. When they're browned a bit on the top you know they're ready!
    Enjoy!

    Sunday, November 27, 2011

    Settling into the Winter Routine again

    My love! Great day for the park yesterday!
    Winter is rolling its way here in Michigan, although you wouldn't have known it by the temperature yesterday- incredible weather! I've been getting back into what has been my Winter Routine for the past several years;
    Turning to use the food I've canned, frozen, or have stored;
    Heading over to the Ann Arbor Farmers' Market on Saturday mornings in search of root vegetables, winter-hardy greens, local herbs, honey, and other winter goods;
    Making and eating a lot of chillis, soups, and stews.

    It feels good to have been at this whole "homesteading" thing long enough to even have a routine to return to. Each year, I get a little closer to being more self-sufficient, although on the whole I'm still very far away from that goal.

    Storage root veggies and squas
    This year it seems I'll be all set through most of the winter squash, sweet potatoes, potatoes, carrots and onions, meaning I'll be able to eat those things locally throughout the entire winter, based on what I've grown and/or bought locally and stored. I also have some canned corn and green beans that will probably get me through at least until January or February. I've got 5 pints and 7 half pints of jam, which will last me until next year's jam-making begins.

    I'm going to try to focus on utilizing the root vegetables I have and getting what I can locally as far as winter greens goes, and will again this winter try to avoid purchasing produce that is way past its' season: Peppers, fresh corn, etc. The same goes for fruits- I'm going to stock up on apples that will last for a while in my chilly "mudroom" space.

    I usually cave and purchase frozen fruit in the winter because I start to crave it; we're lucky around here to have a great Winter CSA called Locavorious- they purchase locally-grown fruits and vegetables while they're in season and then they flash-freeze them, so folks can have this great produce available all-year round! While I didn't purchase a share from Locavorious, they are usually at the Ypsilanti & Ann Arbor Farmers' Markets and I love that I can still buy local in the winter!

    What's your technique for eating local in the Winter?

    Wednesday, November 16, 2011

    Giving Market Gardening a Try?

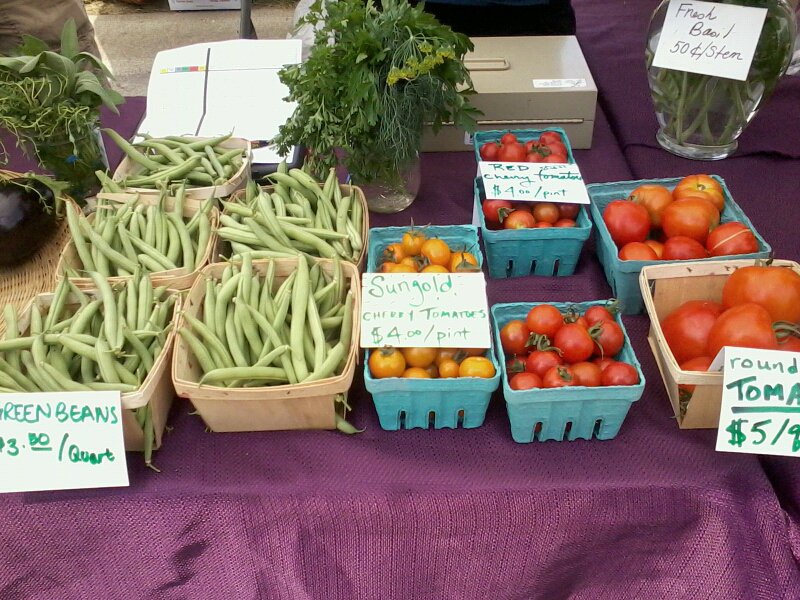
    The organization I work for is helping small-scale growers in the area to sell their produce at the Farmers' Market we run by supporting a pilot year of an Ypsilanti-based Market Garden Co-operative.

    If you're not familiar, a Market Garden Co-op is a group of smaller growers that would like to sell in a market setting but most likely don't have enough produce to justify having their own stand or stall at the market. Growers can become Members or Sellers, and they basically buy in to the group in order to share a stall space with other small growers. Proceeds from the stall are shared in different ways, and Market Gardeners can pool resources like tables, a tent, chairs, and other infrastructure pieces. The Co-op also shares costs in things like advertising and promotions, so I wouldn't have to have my own business, business name, flyers, etc.

    Right now, I am doing one of my favorite things; focusing another Crazed Project! I've mentioned this tendency in recent posts- my love of taking on a potentially out-of-reach project and being obsessed with it until I can make it a reality :) The new project on my mind recently has been growing some produce for the market garden co-op!

    I've been thinking about growing carrots for Market, specifically. It seems that we almost never have carrots available at our Farmers' Market, and they're kind of a staple crop- I mean, people eat a lot of carrots, right? I've heard that carrots are hard to grow, or maybe they're just hard to grow in our soil here in S.E. Michigan. I've had a lot of success with growing carrots at home, and I think I'd have to put some work in to grow market-quality carrots, but it could be very possible!

    There are several steps I would need to take in order to prepare for selling at Market:
    Dragon Carrots- High Mowing Seed Co.
    • Select varieties that people would actually like to buy. At first, I was considering all those pretty, colorful types like Dragon Carrots, but maybe those would weird people out? 
      • I need to think about who the customers are at the market and what type of quality and product they'd be expecting
      • I'm beginning to think that the more "regular" and "grocery store" that the carrots look, the more likely they would be to sell
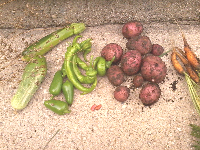
    • Soil improvements would need to be made. Carrots supposedly like sandy soil, which I have. I think I'd need to work the soil some, because carrots are pretty sensitive to rocks and things and will take a turn and end up all crooked if they "hit" something as they're growing.
    • While its' not necessary, if I invested in some row cover and quick hoops, which I'd like to have anyway, then I could potentially starting selling earlier in the season and sell them later into the fall as well.
    Carrots would also be a good option for me to sell at market because I love them, and they store well. So if I don't sell a lot of them, I will be able to eat them up and store them for my own use without feeling like I "lost" money.

    Thoughts? Opinions? Advice?

    Monday, November 14, 2011

    Dark Days Challenge- will you join me?

    This year, I've decided to join with other garden/foodie bloggers in participating in the Dark Days Challenge! As part of this challenge, I'll be making at least one meal each week that featuring sustainable, organic, local, and ethical ingredients, and blogging about it to share with others! I think this will be a great way for me to strategically use some of the veggies I've been storing; potatoes, carrots, squashes, onions, and find new recipes and meals to feature them in! Please tune in here to check out the dishes I make- if you're interested in learning more, see below!

    Dates                                                               
    The challenge runs from Sunday, November 27th, 2011 to Saturday, March 31st, 2012.
    What’s the Challenge? 
    I will cook one meal each week featuring SOLE (sustainable, organic, local, ethical) ingredients, write about it on this blog and email a recap to the larger group on the Not Dabbling in Normal blog.
    What does local mean?
    Traditionally, local food challenges call for a 100 mile radius. Winter time is more difficult in many climates, especially if you’re new to eating locally, so my default winter definition is 150 miles. If you'd like to participate, you can choose to make your radius smaller or slightly larger as you need. Typical exceptions to the local requirement are oils, coffee, chocolate and spices. If you’re making fewer or more exceptions, please note that on your first post.
    How do I sign up?
    Head on over to (not so) Urban Hennery to find out more info and to sign yourself up if you'd like to participate as well!

    Saturday, November 12, 2011

    Putting the Garden to Bed for the Winter


    Today, I was overcome with Garden Fever again! Occasionally I will be suddenly compelled to do a crazed home or garden project. Last month, it was making a Root Cellar out of 5-gallon buckets. The month before, it was creating a "built-in" storage area for the jars I've put up. Last winter, it was building an entire seed starting set-up in my basement. Today, it was finally placing the remaining 40-odd cinder blocks that have been sitting in my driveway for 2 years! I muscled-up, and  lifted about 50 cinder blocks to form a reaaally long raised bed- 4 ft x 36 ft! This will add about 144 square ft to my total edible veggie-growing space, bringing the total square footage up to 341 sq ft of raised bed gardening space

    New garden bed on side-yard
    <----------- Check out the new addition:
    I've started planning what I want my garden layout to look like next spring. It's way too early to be thinking about this, I know. But laying out a garden plan is my version of geeking out. Others may play video games, scrabble, or DnD; my "cup of tea' is planning, strange as it may seem.
    Canned good "built-in"

    This year, there have been several major homestead successes, and several things I'd like to improve upon for next year:

    2011 Successes:
    + Two 5-gallon Root Cellars
    + 36 sq ft extra garden space
    Winter veggie storage
    + Tried seed starting indoors
       - started zuccs. & tomatoes
     + Made additional storage for canned products
     + Winter veggie and bulk good storage rack added

    Improvements for 2011:
    + Add 144 sq ft of garden space
    + Grow enough carrots, onions, & potatoes to eat in summer and last until January
    + Grow and dry more beans- goal= 2 pints of dried beans
    + Try to start everything from seed indoors this year (except for carrots, onions)