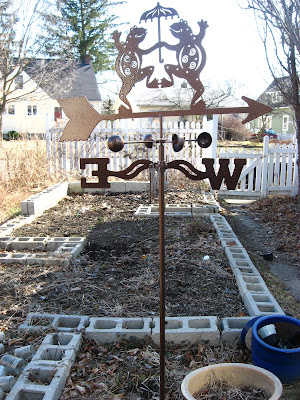
This will be my 4th year gardening in raised beds, and the 3rd gardening in my indestructible concrete block beds! There are many benefits to raised bed gardening, including looser, better draining soil, mitigated risk from toxic and lethal chemicals sometimes found in urban soil, and the fact that they're a bit easier to reach because they're higher up.
Gardening in a concrete block garden offers all of these benefits, with the additional perk that concrete blocks will not deteriorate like wood beds will. Especially if you get untreated wood (which doesn't leach chemicals into the soil like treated wood does), you could be looking at replacing your beds in 5-8 years.
If you are thinking about concrete raised beds for your backyard, let me share some tips and steps to create your own awesome garden:
This is a first step for any garden. In general, if you can find a spot that gets sun or partial sun, that will offer you the greatest options in what you can plant. Other considerations- level terrain, proximity to a water source, visibility, potential for expansion. I chose the left side of my backyard, which faces South & was wide enough for a substantial garden.
Step 2: Purchase concrete blocks
You can get concrete blocks from major home improvement stores, or smaller hardwares. I purchased 150 concrete blocks for $200 off of craigslist, which included delivery. At Lowes, they're listed for $1/block, so if you can borrow a truck from someone, that's a good bet. I liked that I was re-purposing my blocks though, rather than buying new.

Step 3: Install landscape fabric/ place blocks
This is where you can get a little creative! Beds can be 1 or 2 blocks high, and as long as you have space for. I find that 3-4' wide is a good distance, otherwise it gets hard to reach your plants in the middle, and easy reach is a big benefit of raised bed gardening! I chose sort of an "S" shape initially, to maximize the space I had available.
Step 4: Order compost to fill beds
 Step 5: Fill beds with compost & Plant away!
This is a pretty self-explanatory step- once you get the frame of your beds all laid out and make sure the concrete blocks are level, you can fill in with compost! I always fill mine to the top and level them out with a rake- the soil will settle a little bit so be generous. If you have extra soil, you can fill in the concrete block holes as well, and use that space for planting flower, herbs, whatever you'd like!
Step 6: Expand beds so they eventually take over your yard (optional)
As you can see, I started with one square bed that was 4'x8'. Before I had even put in compost, I expanded it to be the larger, "S" shaped bed. The next season, I added the tail on the bottom of the "S", and this season, I've added the additional section that runs the length of the side yard (pictured on right). If you're going to grow potatoes or carrots, you can just add a second layer of blocks on top of that section (like I've done in the picture on the right). It's so easy to expand and customize that I've gone from 32 square feet to about 200 square feet in just a few short years- whoops! ;-)
Whether you start small or have visions of grandeur right from the start, concrete blocks are an affordable, sustainable choice for your yard or garden!


